
Engine Oil, Coolant, Brake Fluid: A First-Timer's Guide to Checking Under the Bonnet

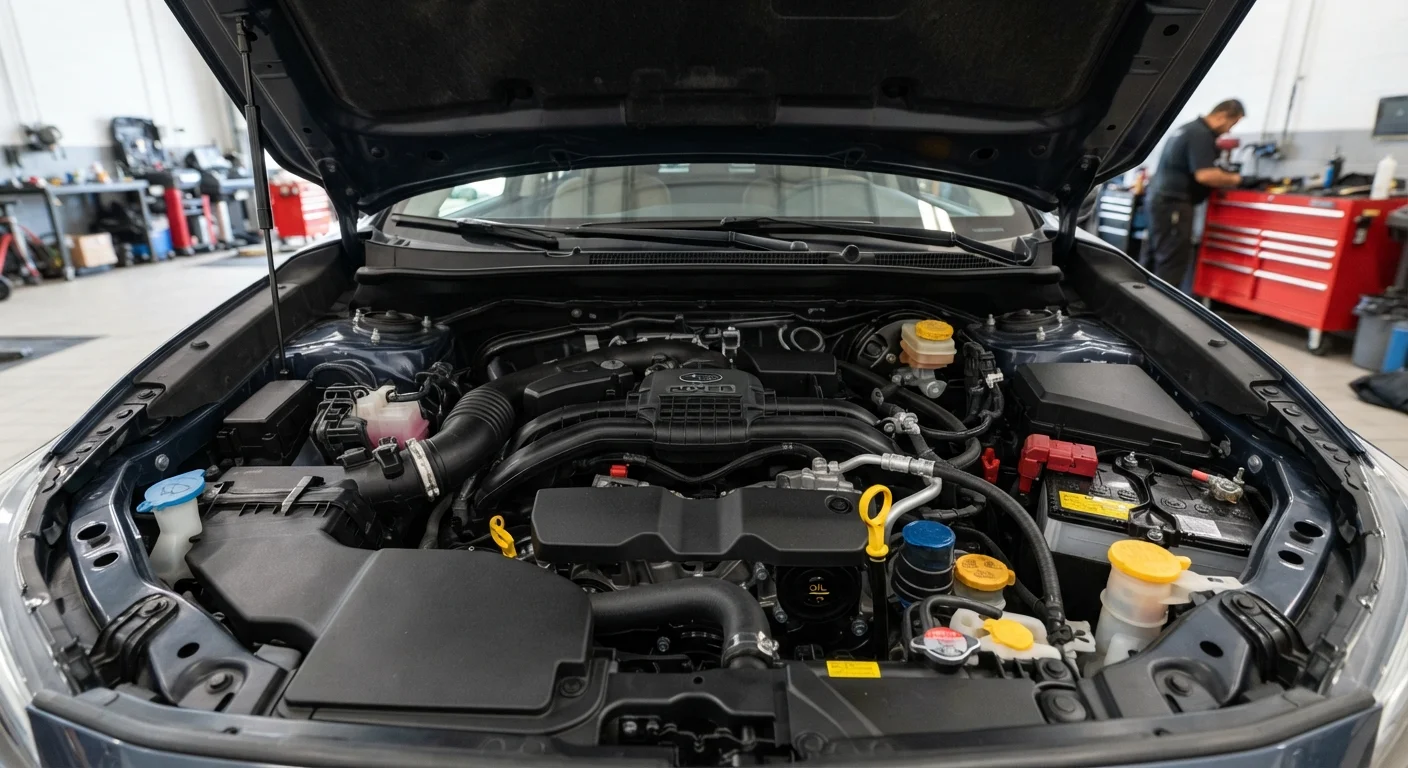
Photo: TotemBuzz.com | Your Lifestyle Companion editorial
Key Takeaways
- Always check fluids when the engine is cold and the car is parked on level ground.
- Three fluids to monitor regularly are engine oil, coolant, and brake fluid.
- Each fluid has a dedicated reservoir or dipstick — your owner's manual shows their exact locations.
- Low or discolored fluid often signals a problem worth investigating before it escalates.
- Topping up fluids yourself is straightforward; diagnosing leaks or persistent drops should involve a mechanic.
Why These Three Fluids Matter
Your car relies on a handful of fluids to keep its mechanical systems running safely. Engine oil lubricates moving metal parts to prevent wear; coolant (also called antifreeze) regulates engine temperature; and brake fluid transmits the force of your foot on the pedal to the brake components at each wheel. When any of these drop too low or degrade, the consequences range from accelerated component wear to brake failure — none of which you want to discover mid-journey.
Checking these fluids takes under 20 minutes and requires no mechanical expertise. It's one of the most practical habits a new driver can build. If you're just getting started with car ownership, this check fits naturally alongside the broader orientation in our first-time car owner's guide.
What you will need
What You'll Need Before You Start
You don't need a toolkit or mechanical experience — just a few basic supplies and your owner's manual. The manual is genuinely essential here: fluid reservoir locations differ significantly across vehicle makes, models, and years, and using the wrong fluid grade can cause damage. Keep it in the glovebox so it's always accessible.
Owner's Manual
Identifies the exact location of each fluid reservoir and dipstick, and specifies the correct fluid grades for your vehicle.
Lint-Free Cloths or Paper Towels
Used to wipe the oil dipstick clean before taking a reading, and to clean up any minor spills.
Nitrile or Rubber Gloves
Protects hands from brake fluid, which is corrosive, and from general engine grime.
Small Funnel
Helps pour topping-up fluid into narrow reservoir openings without spillage.
Flashlight or Phone Torch
Improves visibility inside the engine bay, especially around dark reservoirs or low-lit garages.
How to Check Your Fluids: Step by Step
Follow these steps each time you check under the hood. Doing this consistently — roughly once a month or before any long drive — gives you a reliable baseline and helps you notice changes early. Our pre-journey safety checklist incorporates a quick fluid check as part of a broader five-minute routine.
Never Open the Coolant Cap on a Hot Engine
Park safely and let the engine cool
Pull onto a flat, level surface — a driveway or parking lot works well. Turn the engine off and wait at least 30 minutes before opening the hood. Oil and coolant readings are inaccurate when the engine is hot, and hot components pose a burn risk. Engage the parking brake before you exit the vehicle.
Open the hood and locate the fluid points
Pull the hood release lever — usually found beneath the dashboard on the driver's side — then release the secondary latch at the front of the hood. Prop the hood open using the support rod if your vehicle doesn't have an automatic strut. Use your owner's manual or the underhood label (many vehicles have one) to identify the oil dipstick, coolant reservoir, and brake fluid reservoir. Their locations vary by make and model.
Check the engine oil level and condition
Pull the oil dipstick out fully and wipe it clean with a rag. Reinsert it all the way, then pull it out again slowly. Read the oil level against the two marks on the dipstick — your level should fall between them. Also look at the oil's color and texture on the rag:
- Amber or light brown: Normal, healthy oil.
- Very dark or black: Oil is old and due for a change.
- Milky or frothy: May indicate coolant mixing with oil — have this inspected by a mechanic promptly.
If the level is below the lower mark, top up with the oil grade specified in your owner's manual.
Inspect the coolant level
The coolant reservoir is a translucent plastic tank — you can usually read the level without opening it. Look for the MIN and MAX markings on the side of the tank. The fluid should sit between these lines. Healthy coolant is typically green, blue, orange, or pink depending on the type — it should appear clear, not murky or oily. If the level is consistently low, or if you notice the fluid looks contaminated, have the cooling system checked by a professional.
Check the brake fluid level
The brake fluid reservoir is a small, semi-transparent plastic container near the back of the engine bay on the driver's side. Without removing the cap, check that the fluid level sits between the MIN and MAX lines. Brake fluid is typically clear to pale yellow when fresh. Darker fluid suggests it may need replacing — this is a job for a mechanic. A noticeable drop in level without explanation could indicate a leak in the braking system and should be assessed professionally before you drive further.
Top up any low fluids and close the hood
If topping up is needed, use only the fluid type and specification listed in your owner's manual — using the wrong product can cause damage. Pour slowly using a funnel, rechecking the level as you go to avoid overfilling. Once done, replace all caps securely. Lower and press the hood firmly until it clicks shut — give it a gentle upward tug to confirm it's latched before driving.
Keep a Simple Maintenance Log
When to Stop DIY and Call a Mechanic
Checking and topping up fluids is well within a beginner's capability. However, some situations call for professional attention:
- Oil or coolant levels drop repeatedly between checks, suggesting a leak.
- The oil dipstick shows milky or frothy oil — a possible sign of internal engine issues.
- Brake fluid is significantly low with no obvious cause.
- The temperature warning light activates while driving.
- You notice fluid pooling under your parked vehicle.
None of these are DIY scenarios. A qualified mechanic has the tools and experience to diagnose the underlying cause safely. For a clearer picture of which car tasks are appropriate to handle yourself and which aren't, see our guide on knowing when to see a mechanic.
Brake Fluid Is Corrosive — Handle with Care
This article provides general automotive information for educational purposes. It is not a substitute for advice from a qualified mechanic. Always consult your vehicle's owner's manual and, where in doubt, seek professional assessment before driving.
The content on this site is for informational purposes only and is not a substitute for professional advice. Always consult a qualified professional for guidance specific to your situation.